
padded space bag material - article and video tutorial
Alex Beddows joins us again and provides a breakdown on his Padded Space Bag Material in both video format as well as an article. Whichever your preferred method of learning is, we’ve got you covered. Dive in to see how Alex used Marvelous Designer to speed up his workflow process and created this Paul Pepera inspired material.

Introduction
Hey guys, thanks for swinging by this article! So a little bit of context to this material, before this one I did the space hatch material, and the corners are fabric which I had some support from Tjalle Keus in figuring out. But for my next material I was inspired by a piece created by Paul Pepera, but I knew I needed to approach the problem a different way, after checking out James Ritossa’s take on his space materials he mentioned using Marvelous Designer to create his fabric. At the time I had been looking into Marvelous for environment props such as flags and blankets so it seemed like a good time to take a look at something slightly more functional and have a go at using a premade height map I only refine in Substance.

References
Fabric with Marvelous
This is my basic setup in Marvelous, please understand this is what I got when bumbling around in the software, there is probably a more efficient ways to achieve this effect, but I was experimenting trying to get something close to what I wanted. I use an imported mesh as an anchor to the simulation, the red panel is attached to the anchor so that when I simulate the whole thing doesn’t float off. The side panels are slightly narrower than the top panel so that the top panel has this muffin top style aesthetic.

Marvelous Designer


The top panel I drew elastic lines in which would represent where a belt would contract around the bag, I did 4 iterations of these lines to give me 4 unique bag designs. Each time the elastic was always on but I tweaked its strength to give slight variation in the bags aesthetic, giving the look of different strap tightness.
I also played with the pressure, it always needs to be positive in order for the simulation to balloon out and not contract in on itself, higher the number the tighter the bag was. I had to make sure the elastic tension made sense for the bag pressure, it would not make sense to have a super tight strap on a very deflated bag.
Zbrush
Once I export the simulation I take them into Zbrush, because I haven’t got the highest end PC I have to simulate on lower quality, meaning the export is quite faceted, so in Zbrush I will sub divide and clean up slightly before using the grab doc feature to capture the height maps of each of my bags.

Grab Doc in Zbrush
These are the 4 bag exports, with varying belt orientations and pressure within the bags. This is the bulk of material essentially created, as these bags are the backbone of material and the focus. I think I would 100% use Marvelous again to create any fabric type materials, unless it was in a production environment which meant we couldn’t use Marvelous. It was quick to create, And I could iterate with relative ease through this pipeline and the quality I get out the other end speaks for itself.


Substance Designer
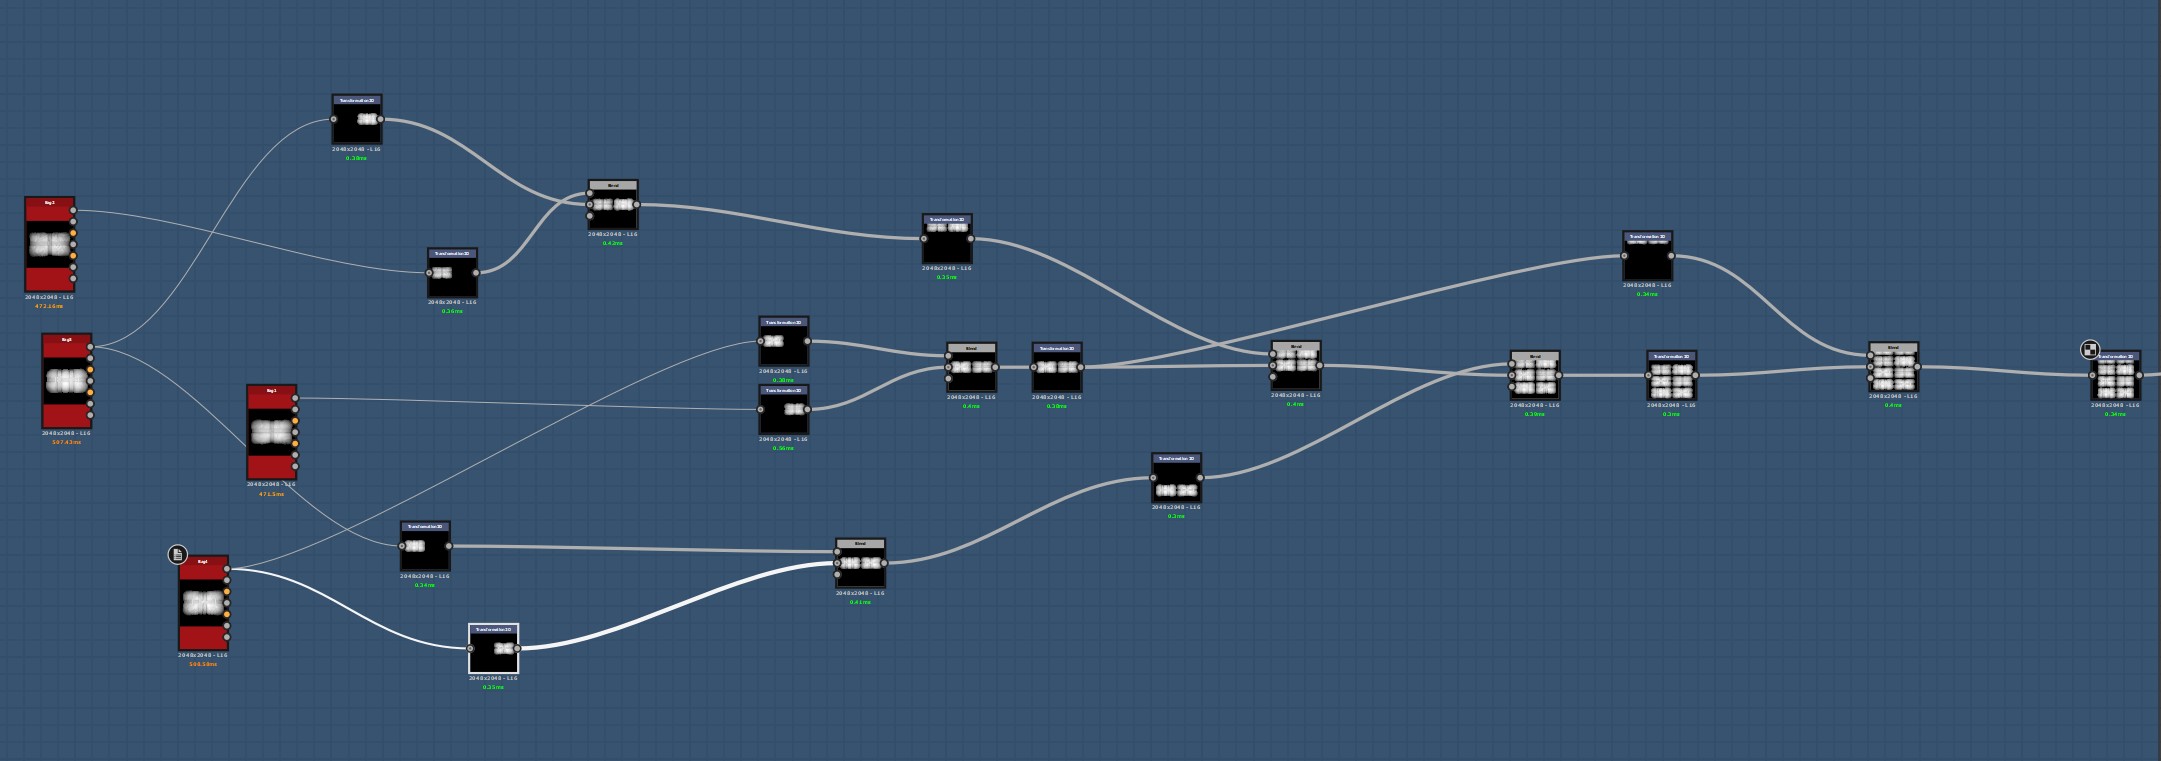
So once we get into Substance Designer this was my end ‘top graph’. I used sub graphs for each bag, a graph for a graphic and a graph for the buckle which get assembled in this top graph.

Substance Main Graph
The graphic was simply a series of text nodes and transforms to give a similar feeling to the reference image, a brand, a framed warning label and some Chinese characters.


Details
As for the buckle, it started as a shape and I simply cut away from it using other shapes, transforms and subtractive blend. This bit is quite low detail due to how small it is in the final material; I could have done a more detailed version but it felt unnecessary.

When it came to the bags themselves there was very little that needed to be done. I kept the modifications very modular so I could quickly replicate the process on the other 3 bags. I also used Daniel Thiger’s multi directional warp node, which I received from one of his tutorials, but with Substance Designer adding their own I would use that now.
The graph starts with the bag input which I warp ever so slightly with a perlin noise to break the blocky shape up. I Multi Directional Warp 2 perlin noises together to create additional wrinkles, as a rule of thumb I always multi directional warp any noise by the original shape so that it feels as if it is being influenced by the underlying shape rather than stamped on top. I also blend some micro noise detail and a mesh pattern to give the bag a canvas aesthetic.

I then add the belts. First I subtract a blurred version of the belt from the original shape so that the belt sits within the shape better rather than on top. The belts themselves are very simple, a bevelled rectangle with a horizontal gradient blended on top so the belt conforms to the bag shape, and a vertical gradient so that the belt dips in the center as a high tension belt would.

Colour & Roughness
As for the albedo and roughness, because I height blended everything together I got my masks given to me. I used the graphic I made as an alpha to stamp onto the bag, and any noises used to generate gradient maps was always warped by the height. I also used a curvature blend on top, because the bag gets shrunk down, I used the curvature to help boost them details back up. I also used a dust node at the end to help tie all the elements together rather than relying purely on AO for that.

On the top graph I am using transforms to position and blend the bags together, then I just copy this whole group and change the input to roughness, albedo or metallic. I also created some side supports using simple transforms and bevels.
And that’s it! I have to admit I was kind of shocked how well Marvelous worked, it really made creating these bags far easier than it could have been. I think some people can feel like they need to do things 100% in Substance Designer to show their technical skill, and there is an element of truth to that. But on the other side of it, knowing when is suitable to leverage other software to make a job quicker or produce better results is an essential skill, that senior figures within a studio would 100% recognise and appreciate. And that is probably the main thing I got out of this material, the time taken to achieve the quality was quite shocking for me and has probably got me thinking how else I can leverage other techniques and software to drive the quality of my materials up.

There is also a video live on the DiNusty Youtube channel where I walk through the Marvellous project and Substance graph, explaining some of the above points in higher detail so go check that out too, thanks for reading and I hope you guys find value in this!
https://www.youtube.com/watch?v=gl2BJtSllfI
