
CRIME SCENE - MOOD WITH COLOURS AND LIGHTING
Tima Renski did a breakdown of his Crime Scene made with UE4 and talked about how he uses light and colour in his work.
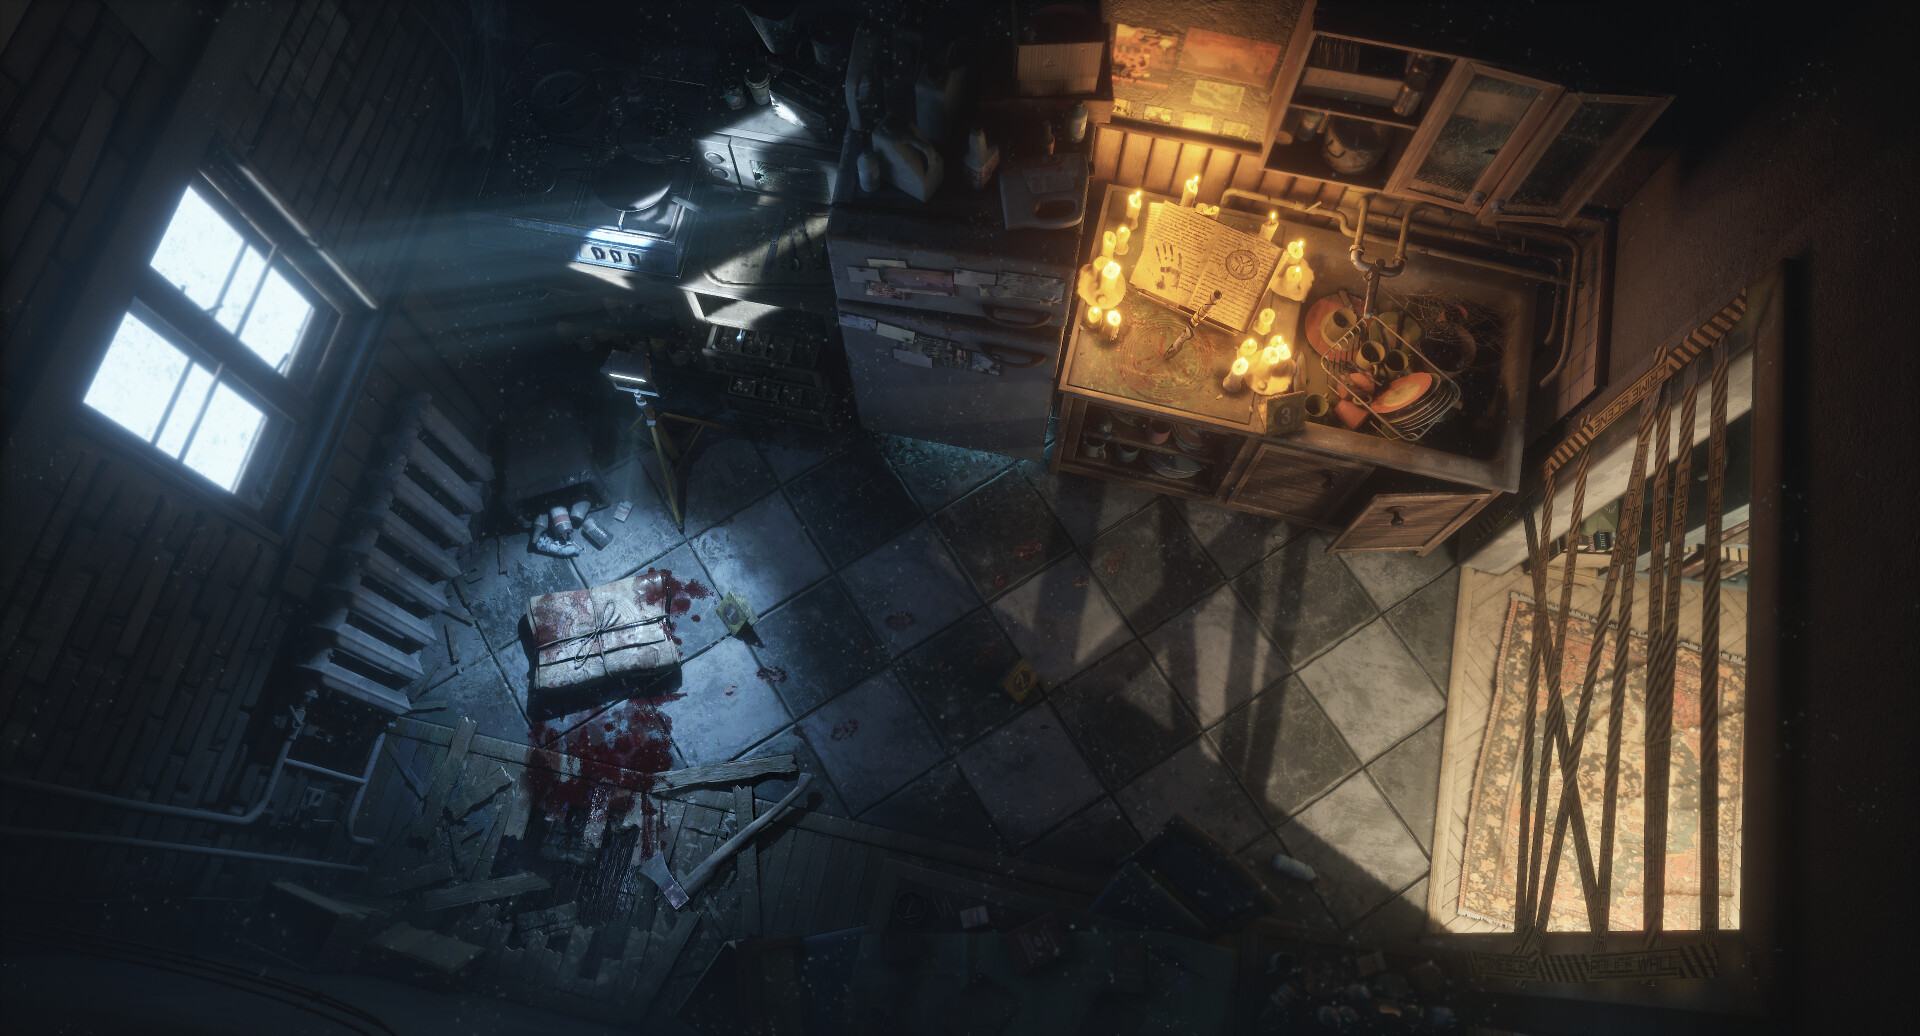
Crime Scene: Rendered in UE4
Introduction
Hi, my name is Timofey Plesovskikh, aka Tima Renski. I’m from Russia and currently I’m a student at University, studying to be an IT specialist. But about 10 month ago I decided that IT is not really what I want to do in life and since then I dedicate all of my time to environment art and getting better at it and now I’m in the process of searching for my first job as an environment artist.
I’m a self-taught artist. I started learning 3D somewhere in 2014, but it was more of a hobby than something serious. I was amazed by films like “Blade Runner” and “Matrix”, I also fell in love with games such as“Planescape Torment”. “Fallout 1-2” and “The Witcher 1-2”. After a hundred times watching those kind of films and playing those kind of games I wanted something more - being able to create something similar in terms of mood and atmosphere. This how I started learning 3D.
My favourite part about games is a good story. That’s why I chose to learn environment art because it’s easier for me to create mood and atmosphere and tell a story through the environment.
I watched lots of Youtube tutorials, created threads on Polycount with questions and threads with demonstrations of my workflow process on some projects so that I could take the feedback from people.
Inspiration and Blockout
It’s always important to clearly understand what you want to tell through your art. Inspiration is one of those things that helps me to do this and guides me through the project.
I always wanted to create a crime scene since I’ve played wonderful game “Blade Runner”, I like the overall mood of this game, but also I really love the mood of horror, occult stuff and madness in first season of “True Detective”. These are the two main inspirations for this project.

The next thing that guides me through the whole project is the blockout. A solid blockout for me is one that answers these questions:
- Is the composition correct?
- Are the assets scale correct?
- How many asset do I need to make?
- How many assets can I reuse?
- Which assets will be primary and which will be secondary?
I find it more comfortable to do the blockout inside UE4. It gives me the ability to tweak FOV, camera position and lighting very easily.

Crime Scene: Progress GIF
In my case, I used the awesome art by Cornelius Dämmrich - “Haze” as a reference for interior design, it was perfect for story, mood and atmosphere that I wanted to show.
Creating Assets, Texturing and Dressing up a Scene
I started working on floor – it’s a very important piece because of the camera angle. I usually start with creating the main props first because they are challenging and more important, they are pieces that give the most impact on storytelling. When I’ve finished with those props and I can say “yeah, i’m on the right way here” - I start to create other assets. Final texturing of all assets was done in Substance Painter.

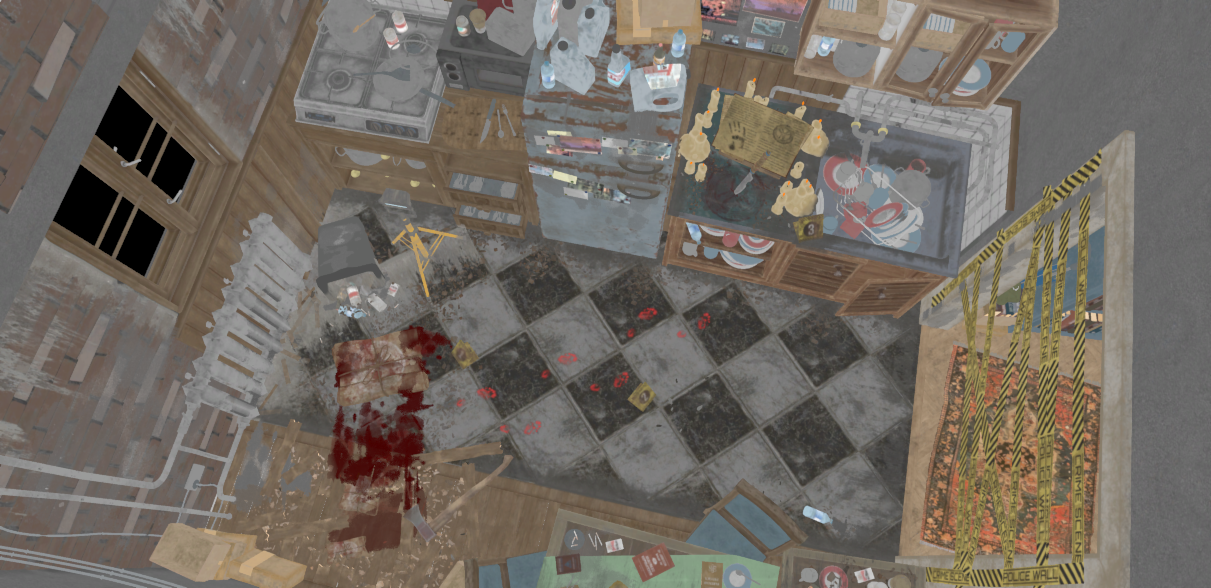
Crime Scene: UE4
I try to keep a few things in mind when I model and texture my assets.
First of all - spend your time wisely. Don’t spend too much time on asset that nobody will even notice or if asset will be barely visible.
Second - what type of texture am I gonna apply to this asset?
Third - it’s important to know the story of the place you are creating. You need to understand how this place has become what it is right now.

Crime Scene: UE4
For main pieces of this scene I used a mid-to-high-to-low workflow using Maya and ZBrush. It’s like when you create a midpoly mesh, then using this mesh as a base for highpoly and lowpoly meshes. I really like this workflow because for me it’s a huge time saver. You can learn more about this workflow from the Military Radio Tutorial by Simon Fuchs. For the rest of assets I made a lowpoly with a tiling texture.
If you’re going for a realistic look of the scene I recommend reading the PBR guide by Allegorithmic, also YouTube channels Substance and FlippedNormals - those guys are awesome with Substance Painter tips and tutorials about PBR workflow.

Crime Scene: UE4
One more way to dress up your scene is using decals, particles and light shafts.
Decals are a very powerful tool and it’s pretty easy to make them. Decals really help to hide repetition of tiling textures or just help you to make some kind of contrast and variation. (For example, I used decals in this scene to make the floor and walls more interesting). Almost all of a dirt, blood and water stains in this scene made by decals.

“M_Leaking” and “M_Puddle” decals from “Scifi Kitbash Level Builder” by Denys Rutkovskyi
Also, another cool thing that decals can do is provide roughness and colour variation - in my opinion it’s two of those things that make materials look realistic. It’s a good practice to look on your overall level of roughness of scene while working on project.

Crime Scene: Roughness
Crime Scene: Base Colour
In this scene I used light shafts to focus the viewers attention on points of interest, and dust particle so that the scene feels like the person living here does not really care about keeping the premise clean.

Crime Scene: Godrays & Particles
Colours, Lighting and Mood
The colour palette of the scene is one of those things that I chose before I even start the blockout. In my opinion, it’s an essential tool for creating mood and atmosphere.

Crime Scene: Colour Palette
I already knew that I wanted a horror feeling - that’s why I chose a desaturated blue. Horror, cold and hopeless - that is what this colour means in this scene.
The next thing I wanted to make is a mysticism feeling - for me it means something ancient, something about the old times and of course candles are a part of this, so the second main colour is the candle flames. It’s also good practice to create contrast in lighting with warm and cool colours to balance the scene. I used colour temperature in UE4 with a value of around 2000K.

Crime Scene: Detail Lighting
I had the pleasure of reading the wonderful book, “Colour and Light” by James Gurney. I think this is the best way to dive into colour theory. As an environment artist, this is essential knowledge. The next thing I would recommend is a video series by Andrew Price about lighting, his method of explaining things is really amazing, and of course a great tutorial by Tilmann Milde about lighting in UE4.
Here are my lightmass settings:

Crime Scene: Lightmass Settings
Tips & Advice
As I’ve said - it’s very important to clearly understand what you want to tell through your environment piece. It’s good practice to collect hundreds and hundreds of references, do research about the main idea. This means that artists should know the history behind the environment that the want to create
Challenges
Lighting is always a very challenging thing, for me it’s all about tweaking values all day before I get the result that I like. I could say the same thing about LUT’s, sometimes they’re tricky to work with.