
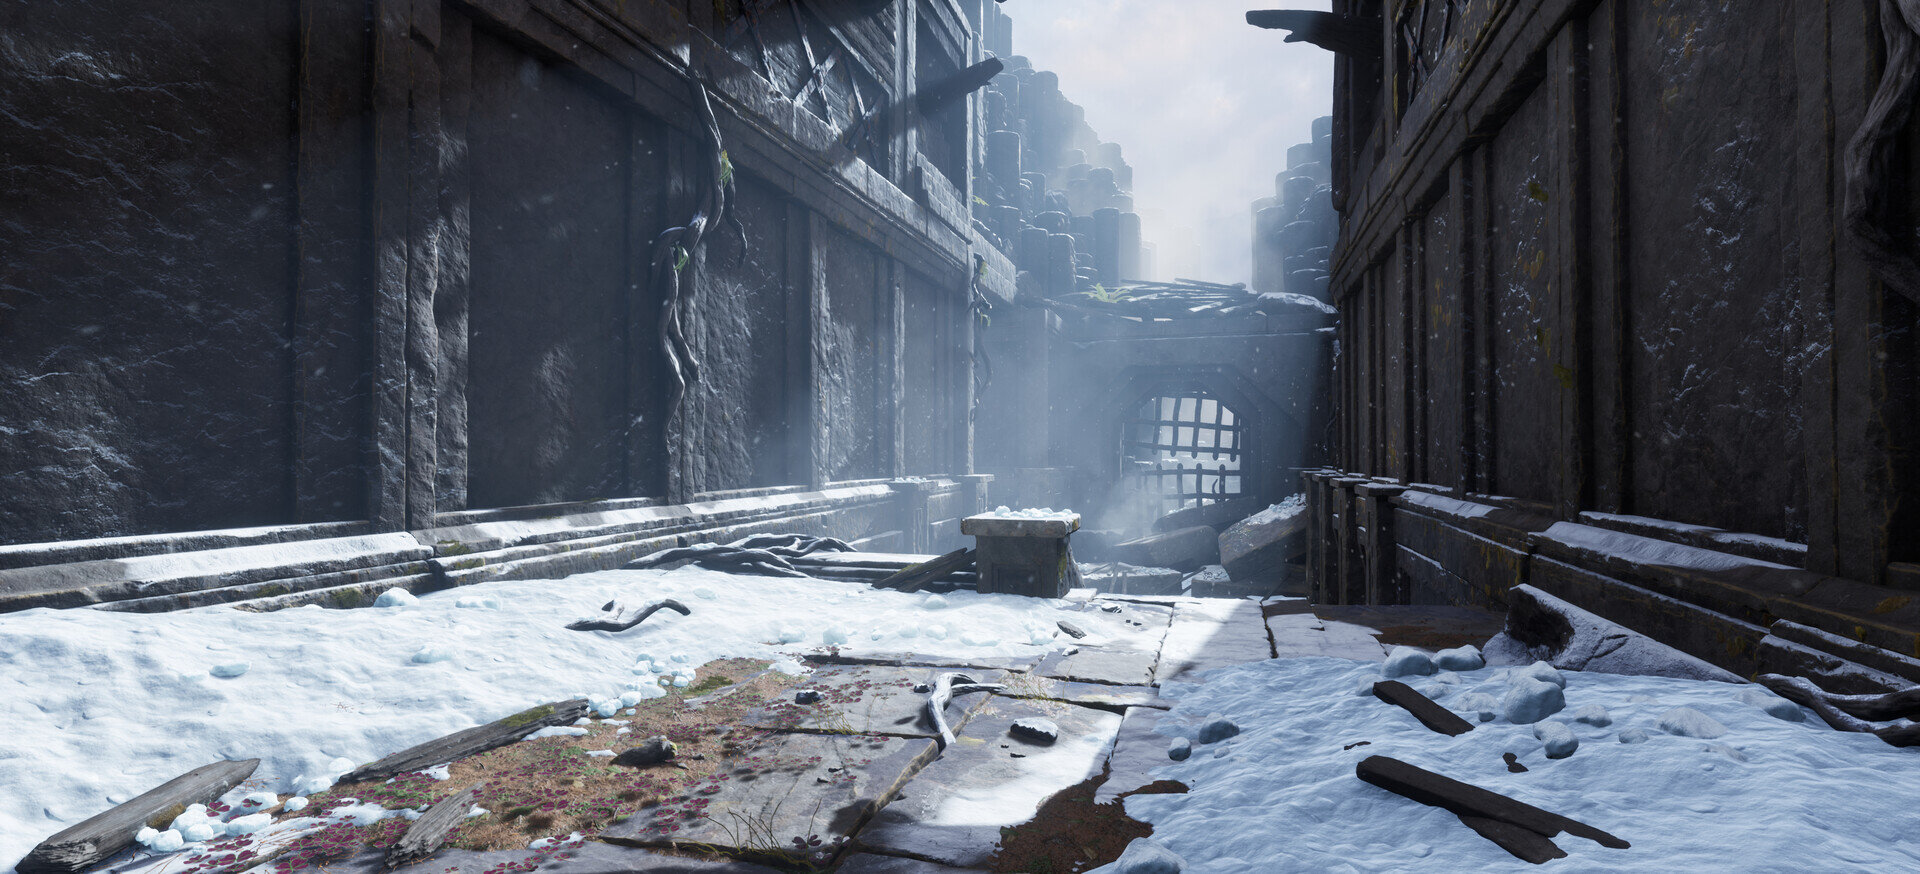
INSPIRED BY GOD OF WAR. CREATED FOR KRATOS
Luca created this God of War fan art while streaming on Twitch. Missed out on the live streams? Fear not, Luca has you covered with this breakdown
Introduction
Hi I'm Luca from Italy! I started doing 3d art as a joke, basically one day my dad was sketching something in paint and I thought if my dad can do that stuff, I for sure can do something better, and then I started my long journey into the 3d world.
When I start a new environment I usually gather a ton of images. This is really an important phase, because every reference has its own variety inside it and I love to gather as much as I can.
Planning
When my research is done, I can start the blockout phase, I keep adding and removing basic shapes just to get the feeling that I want to sell. I keep everything aligned with the grid so it's easy to move stuff around in Unreal Engine 4.
After the blockout phase, it's good to make an assets list subdivided by categories so I can keep track of what I'm doing and what I need to do. A practical example is to divide the assets in meshes, tileable texture, props, decals and trimsheets.
Once I’m done with that I can start refining my blockout by adding the assets in the list.
Another good thing to do, is to define what feature I want in Unreal. Do the assets need some vertex painting to get rid of repetition? Do I need tessellation or POM (Parallax Occlusion Mapping) in the material? And other related question so I can have a clear visual of what I need to do, and modify my workflow to implement those features.
And of course I cannot stress enough how easy is to work with tileable textures and masks! You will save a ton of memory size if you texture your assets directly in engine with tileables+masks!
Workflow
I will explain my workflow, Basically for a huge assets like a pillar it's impossible to have one giant texture to keep the 10,24px/cm texel density, even a 4k map would be not detailed enough.So that's why tileables texture come handy.
The workflow is called layered materials. Basically I've 2 UV maps, one with packed shell into a 0-1 space and the second one scaled up to match the 10,24 px/cm.
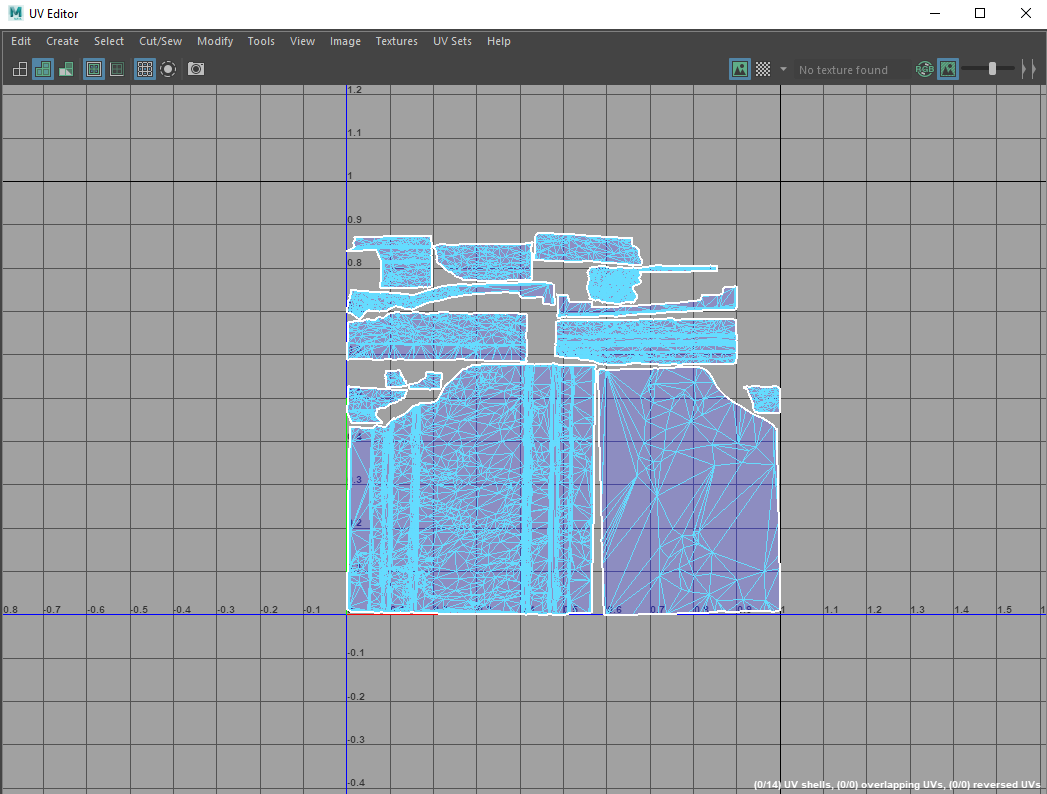
UV 0-1

Tiling UVs
The first one is used for baking the AO, Normal and a bunch of masks for the erosion, dirt and moss.
After that I will combine my maps in a custom master material with a bunch of material function to keep the graph clean. I've made a library made of material functions so it's easy to add or remove things in the Master Material.

Master Material
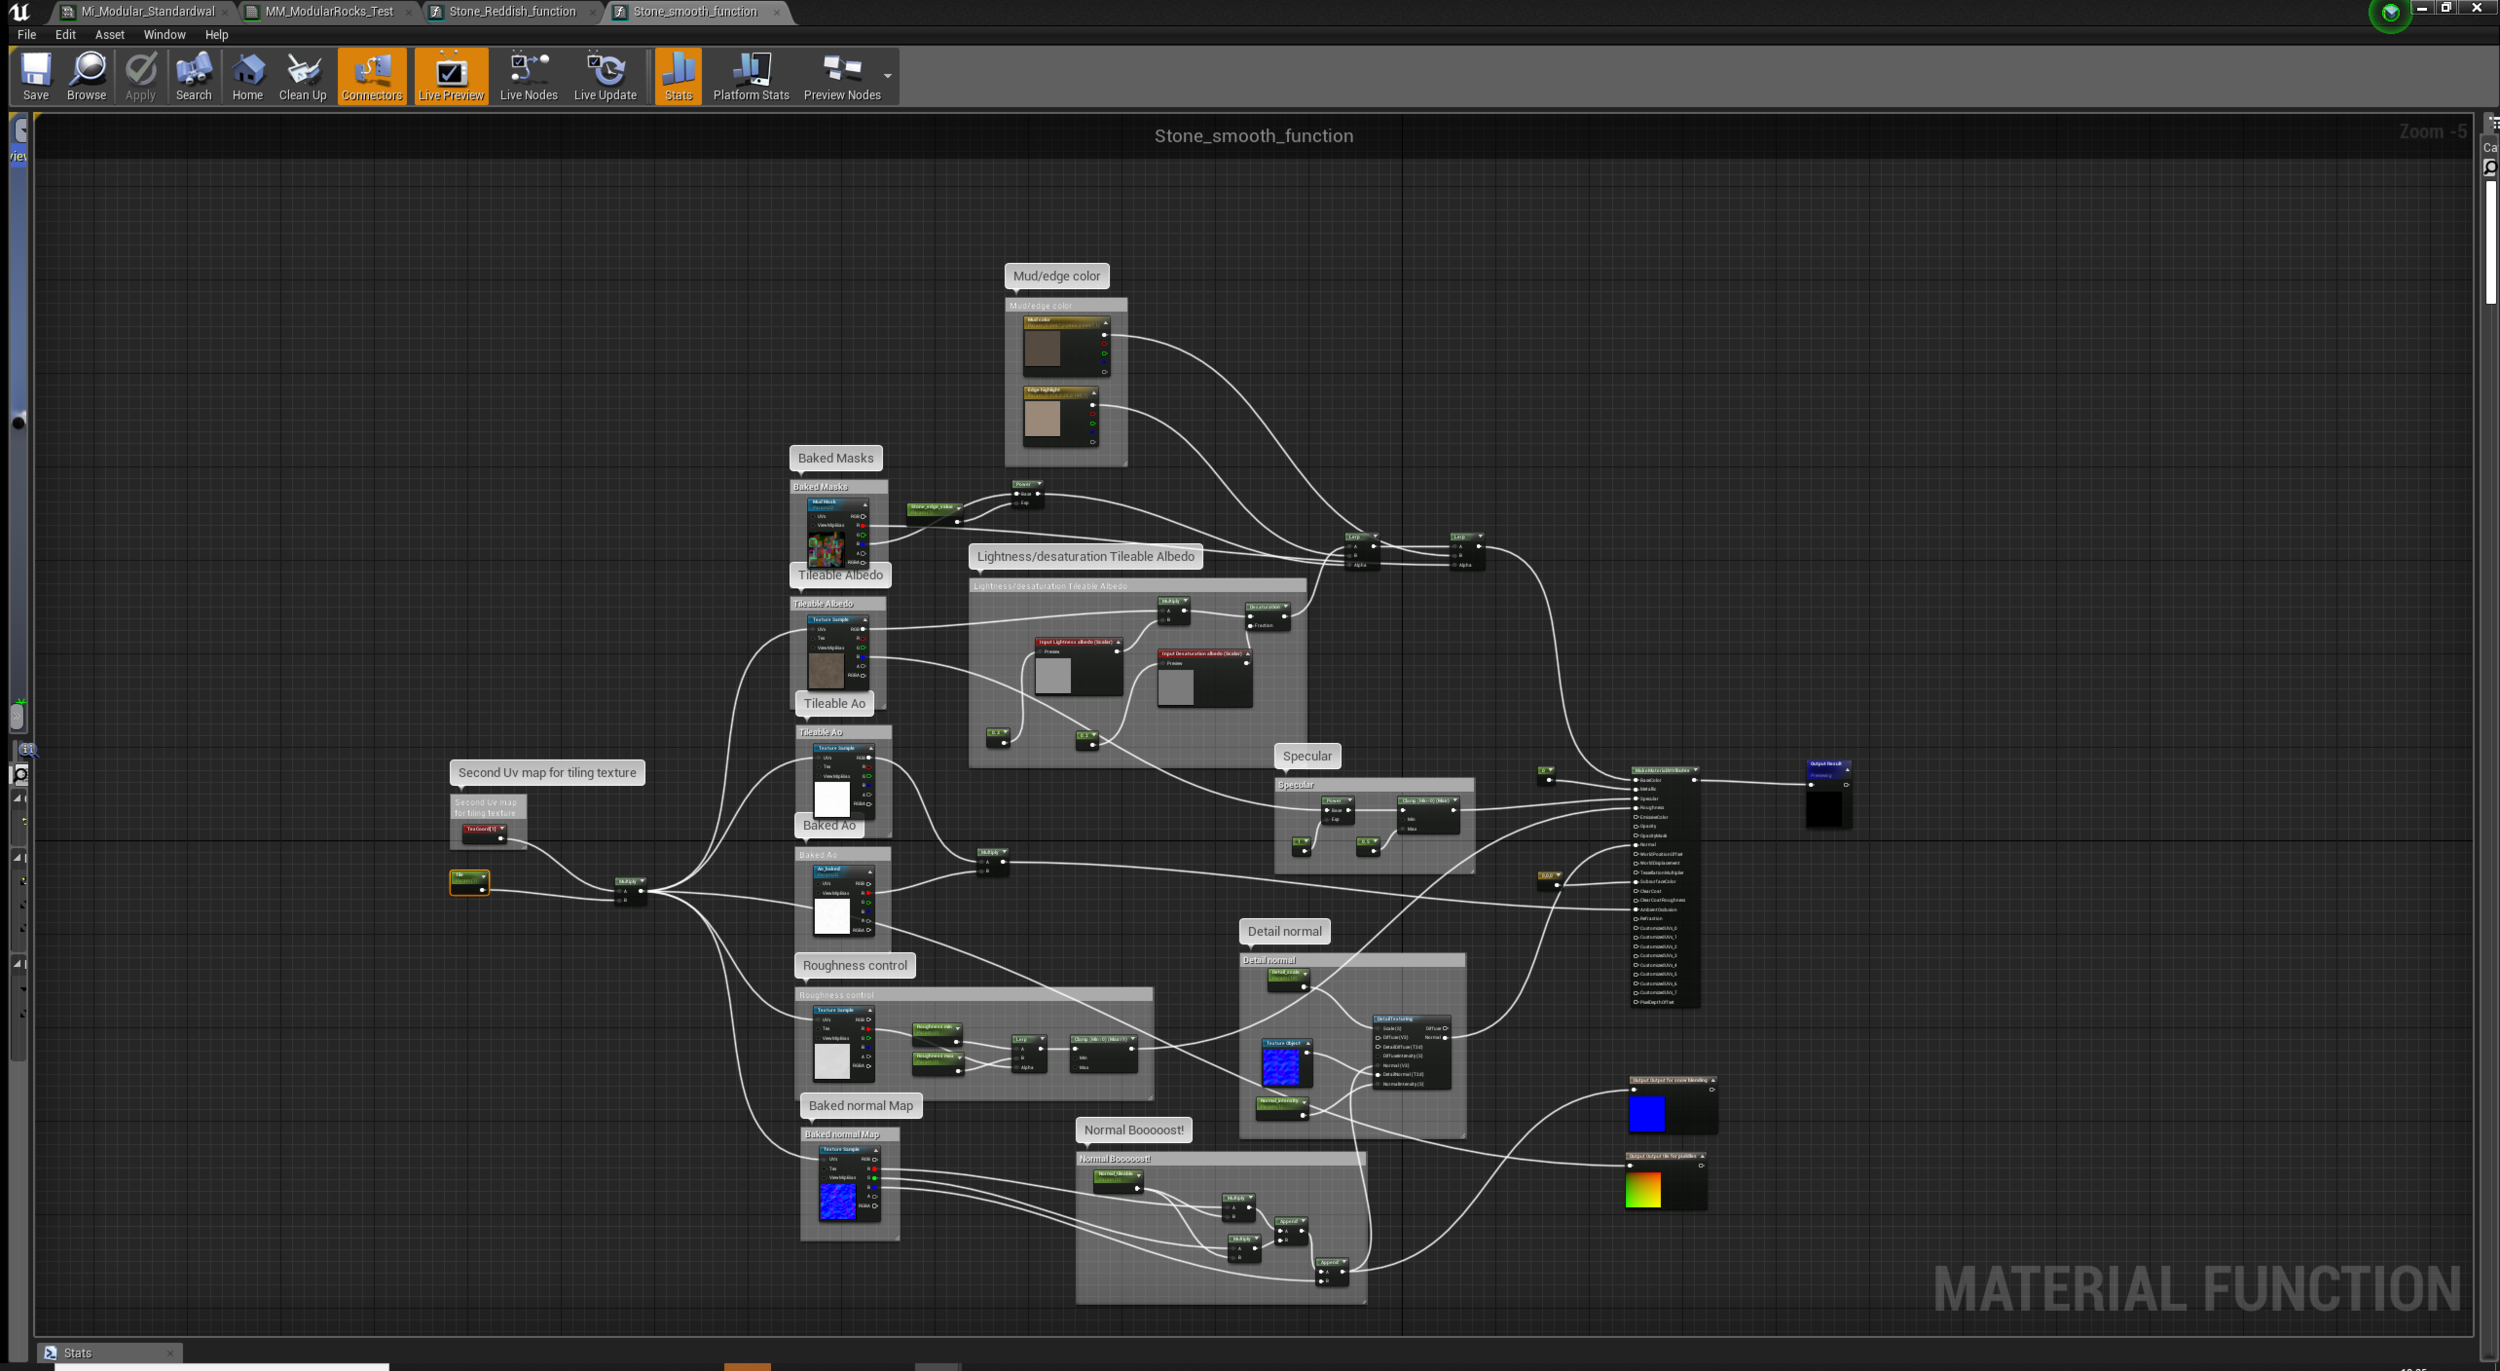
Stone Material Function
The snow its a pretty easy material to do! I've done it in Substance Designer, but the real deal is to have a nice subsurface shader material inside Unreal and a little bit of tessellation to showcase it better!

Snow Material

Talking about snow meshes, I've a tessellated landscape which I can modify by sculpting with the sculpt tool in Unreal, and some snow skirts which are basically a bended plane with tessellation and dither ( That one is really important to soften the transition between the landscape and other assets!) , those are placed in the area where the transition is too harsh to bee realistic. Also the snow is world aligned so I don't have problems with visible seams! Here's a quick demonstration:
One last thing! Since the snow looked too simple and without details I've added some snow clusters made in Zbrush!

Live Streaming
Yes, I stream all of my work on Twitch. It's really good to have people around while working on environments cause they can provide live feedback, tips, sometimes I learn some new neat techniques and sometimes we just have some great laughs!
Sculpting Pillars for Kratos
I like to keep the process simple. I usually do the base mesh in Maya then import it to Zbrush and duplicate it. One duplicate is going to be dynameshed and the other subdivided without smoothing. That way, I can reproject the sharp edges of the subdivided one onto the dynameshed and have clean topology and some crispy edges!
After that It's just a matter of Trimsmooth border with ALPHA SQUARE (to destroy and remodel the edges), Claybuild up for carving details and the last one is the Mallet fast in alternative of Trimsmooth border
No fancy brush for that part.
Then I proceed to sculpt the cracks with an higher polygon count, I use the orb cracks, claybuild up and some photogrammetry brushes.

And for last the small details! I've a couple of good photogrammetry brushes that I use a lot for adding small details quickly, they're custom tweaked in substance designer. But the pack from Andrew Averkin is very good also!
Challenges
My biggest fear was the foliage. I've never touched that topic very deeply so I studied how plants grows in nature, then I created a tool in substance designer to help me out. It’s basically a foliage generator capable of creating everything already on a texture atlas! It works very good with plain plants and it does it's job very well.


Vegetation Test Shot
Another huge problem for me was the lighting and composition.
Luckily, I've found some good tutorials on Youtube.
Tim Simpson: https://www.youtube.com/channel/UCGXr6E_g91ue1rfhA9j4TLA
Clint Cearley: https://www.youtube.com/watch?v=ax130yILbw0&index=2&list=PLVgLT-e3jXPDgeED0pD0BPq8kY1VAZAGa&t=0s
Marco Bucci: https://www.youtube.com/user/marcobucci
Unreal Engine: https://www.youtube.com/user/UnrealDevelopmentKit/videos
After I watched the tutorials, my problem with the composition was fixed but the lighting was still bad. So a friend of mine decided to help me out! Kieran Goodson did a really nice paint-over on top of a screenshot. It helped me a lot for fixing the lighting and get the correct mood! So when you're in trouble or you don't know how to proceed ask for feedback!
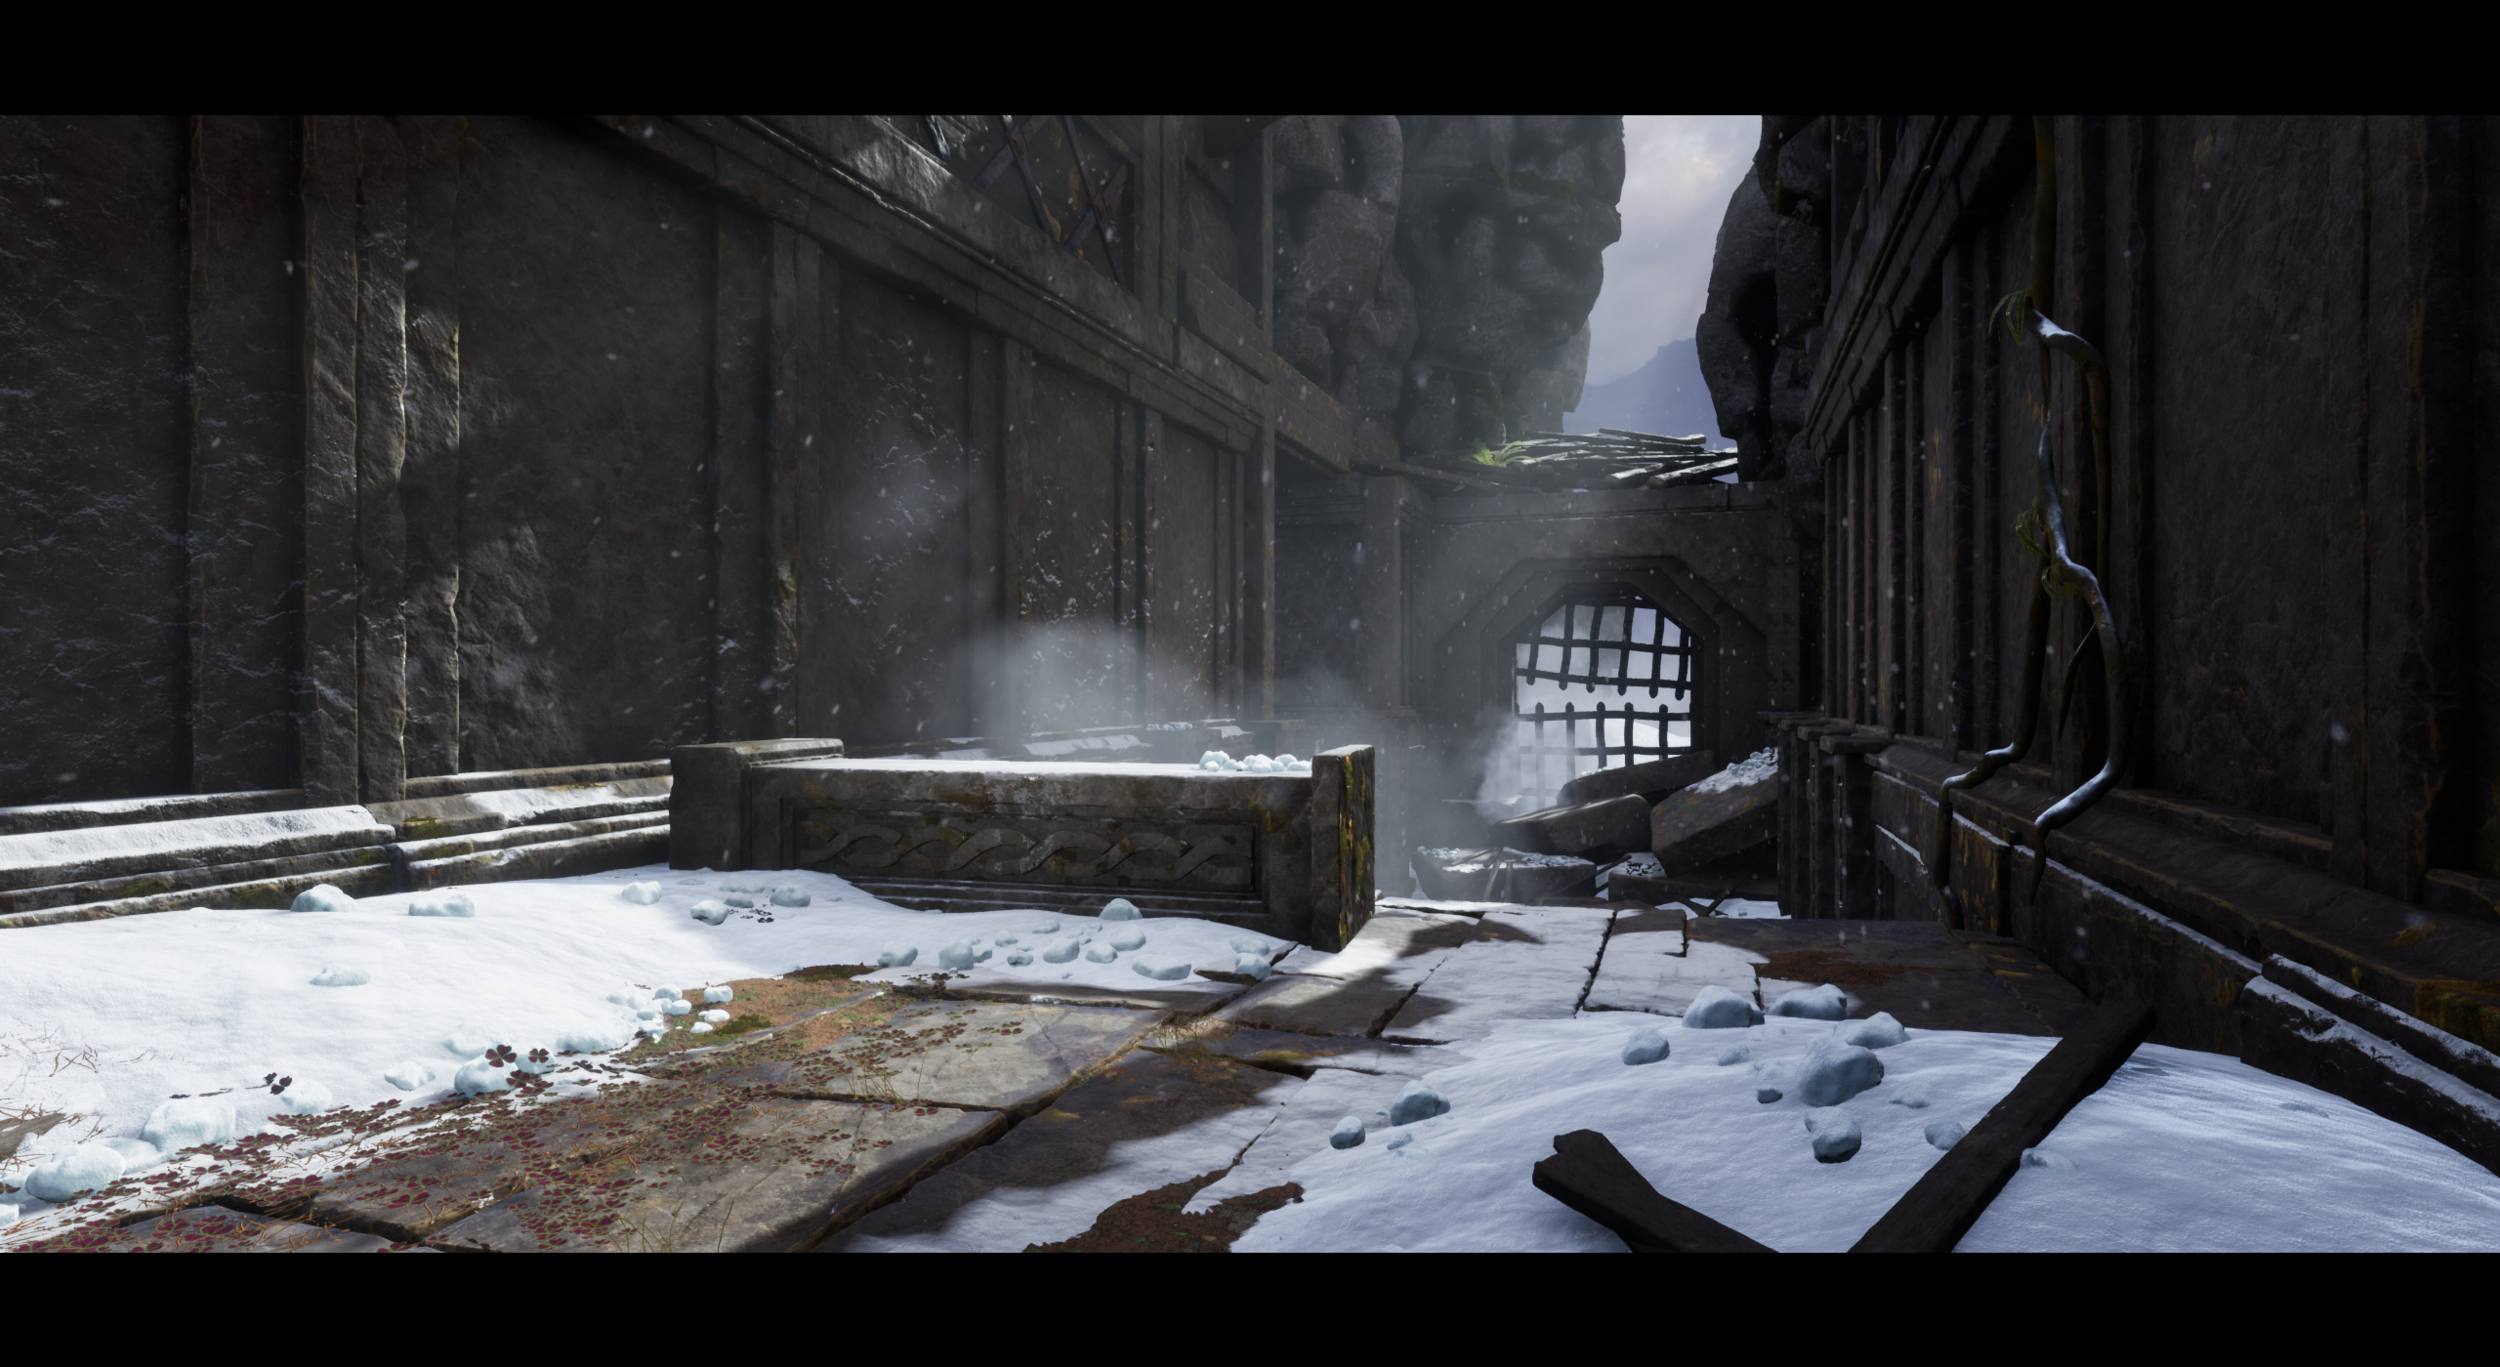
Before Lighting Pass

After Lighting Pass
Tips and Tricks
I'm really a fan of Substance Designer so I made a bunch of tools that helped me a lot through the process. The first one was the foliage generator, RGBA package tool for packing the mask generated in painter and a very simple tool that converts simple black and white images to a displacement map to be used in Zbrush for creating ornaments (that one saved me a lot of sculpting time).
At the moment I'm doing some experimentation with Houdini to automate the UV and baking workflow. I've spent hours doing uv's and correcting errors with the baker, and I think that time could be saved with an optimized automatic workflow.
Advice
When the asset is too big to be textured with unique texture, use the layered workflow (tileable + masks)
If you have some harsh blending in Unreal add the “dither” node to help the transition.
The Unreal foliage tool isn't good only for foliage, use it for scattering debris on the ground.
In Zbrush, sculpt with layer, so at the end of the day you will have already your lowpoly ready to go.
Think modular, you don't need to waste a huge amount of time creating thousands of different pieces.
With rock formations, sculpt a 360 degree rocks so you can turn your meshes and it will be always different. The rocks formations you see in the background are actually one mesh!

360 Degree Rocks being used
Same things with the roots and vines, just 3 meshes.

Vines

Vines Assets

Moss Alpha Card

Vegetation Ground
Work smarter not harder!
Thank so much for reading. If you've any question to ask me those are my contacts:
