
LINCOLN HUGHES - UE4 MASTER MATERIALS
Explore the process of material creation in UE4 with Lincoln Hughes. In this article he walks us through how he plans for, optimises and creates his robust master materials, as well as naming useful nodes to know about and why material functions are must-haves.
Check out Lincoln’s new material packs here.
Introduction
My name is Lincoln Hughes and I’m currently an Assistant Art Director at Tuque Games in Montreal but before that I worked at WB Games, Ubisoft, Electronic Arts and Relic THQ. I’ve worked on a bunch of games, most notably Watchdogs 1 and 2, Far Cry 4, Star Wars: The Old Republic, Luigi’s Mansion 2 and many more. My career has been all over the place, spanning from texture creation and modelling to concept/level art but over the last few years I’ve taken a special interest in learning tech art using Unreal Engine 4.
Goals of Making Material Packs
To be completely honest, I didn’t really have one. I’d been using Unreal 4 for over ten years by that point (roughly 2 years ago) and knew some stuff about the material editor but also knew that there was still a ton more to learn, there always is... I just started screwing around with it, watching endless tutorials and once I started seeing results it further inspired me to continue. I’ve always found that with anything I’m genuinely interested in. It might be hard to start working on something new but once I do I’ll usually enjoy it enough that it creates a cycle of perpetual motivation. It’s all about just forcing yourself to start.
After seeing what masters like Jonas Ronnegard and Raphael Lacoste were doing with their Gumroad marketplaces, I eventually decided that I felt comfortable enough with my own skill level to start creating one of my own. Building a small business for myself felt like the perfect way to level up. Sounds cheesy when I say it like that but I’m 34, so being completely self-reliant financially is definitely a goal of mine and seeing the results of a business that you’ve built yourself from scratch is seriously one of the best feelings in the world.
There were two goals that apply to pretty much every project, product, or art piece I’ve put on my marketplace: To make artist’s lives easier somehow and to have fun while doing it.

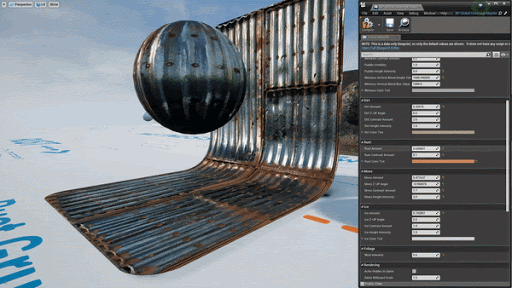
Most Useful Nodes
There are way too many to put here so I’ll narrow this down to a few material functions, which are basically prefabs that are filled with nodes that perform specific tasks for you. There are a ton of them built right into the material editor, all made by the guys at Epic and they seriously do like 90 percent of the heavy lifting in the material editor for almost any type of material you might need. There is so much documentation online that shows how to set all of these up too, so learning how to use them yourself is easier than it has ever been.
World Aligned Blend
This function creates a mask on your mesh that always faces up. This can be extremely useful when you’re trying to procedurally blend snow or moss on the top of your mesh and I’ve used it in some form in almost every single one of my material packs. Whoever made it at Epic is a genius.

Example of World Aligned Snow Blend
Height-Lerp
This function is great for blending between two materials with a height map. Let’s say you have Moss and Rock in the same material graph and you want the Moss to blend into the deepest crevices in the Rock. That’s what this node is for. It can easily be paired up with vertex colour too so that wherever you paint on your mesh, Moss will procedurally blend in using the height-map of the rock.

Example of Height Lerp with Moss
World-Aligned Texture

Example of World Aligned Texture
This function creates World-Space Mapping or Triplanar mapping on your mesh. It’s great for projecting UV’s onto your mesh from all angles, and maintaining a perfect texel ratio everywhere. It’s quite expensive though so use it sparingly.
Most Challenging Material
This is easily my latest Environment Prop Master Material Pack V2. Building it was insane. Making a master material that works for everything can be incredibly complicated and making it in such a way so that it’s optimised with low instruction/sampler counts can be brutally challenging. It took many iterations, redo’s, and endless problem-solving to get it functioning properly, but I learnt so much while doing it.

Overview of Material Examples
I knew next to nothing about UE4’s Blueprint system before that, so learning how to pair up the Material Parameter Collection files with it was huge. For some context, Material Parameter Collection files create values that you can insert into your shaders for global control across all of your material instances. For example, if I pair a Material Parameter Collection value with the material function that controls the amount of Snow in my shader, all of the material instances that have the Snow layer activated in them can be globally controlled by a single value directly inside of a Blueprint. It makes making large-scale changes across your map much more efficient and controlled.
On top of that, compartmentalising every bit of the shader into Material Functions (prefabs filled with nodes that perform a specific function) was quite intense. Making the shader in such a way that parts of it could be reused in other parts, with intuitive labels that were organised properly inside of each material instance, took endless iteration and testing. Doing this is quite essential though because it makes changing things globally across all of your shaders and fixing shader bugs across your world way easier. I’m pretty sure the last month and a half of the 4 month development time was purely devoted to that. It was totally worth it though. Making something that isn’t just a mess of nodes that other people can pick up and read, knowing where to go to change or fix things is imperative.
Material Optimisation
Besides obviously heavy materials like Translucent Glass or Water, most of the time it really comes down to the sheer amount of nodes that you’re using. Paying attention to your instruction count is incredibly important as it’s one of the biggest red flags that your material is too costly. For your most widely used materials, having anywhere between 100-200ish instructions per material instance should be pretty good (this number will definitely vary widely depending on the project / platform) but if you have access to a programmer, definitely get benchmarks for your project from them before taking my word for it. The material functions (i.e. World-Aligned Blend) are usually where you’ll end up taking a massive performance hit because if you open them (some are way more expensive than others) you’ll usually see a million nodes spaghetti-style, so limiting the amount of those (expensive ones) that are active with Static Switches (switches that turn pieces of your material graph on and off) is incredibly important. I think the key thing to keep in mind is to simply pay attention to how much you’re trying to do with one specific material at any given time. Analyse what is essential to the functionality and cut the rest (or turn the rest off with switches).

Shader Complexity Overview
Using World Machine with Landscape Materials
World Machine was definitely a huge part of the reason why I created my landscape shaders in the first place. I actually started the landscape material in UE4 attempting to recreate the same functionality that World Machine uses to texture their terrains, which is how I ended up with an Auto-Material. They texture everything based off of slope angles, adding in flow-maps and other procedural details, so I thought I’d attempt to do the same using the maps that were spit out from World Machine directly in UE4. Doing it in real-time can get quite expensive pretty quick though, so balancing all of that stuff together was definitely a huge challenge.

UE4 Landscape Material
Planning Master Materials
People are always going to use your Master Materials in different ways or require unique functionality that wasn’t initially planned while creating it, so I think predicting that stuff as much as possible throughout the development of them is key. I usually plan the big features first (snow blending, etc), adding in options to use them in specific ways, then move onto the details later.
The more knowledgeable you are about the functionality that’s needed in your materials, the better they’ll be. During development you’ll need to ask yourself broad questions like: What is the most common way that this material will be used or should be used according to industry standards, and how can I tailor it so that it’s incredibly easy to use specifically for that? Or how can I make it so that it’s versatile enough to be used in multiple ways?

And then later on in development, you’ll have to ask yourself more detailed questions like: What should the general channel order of my channel mask be (i.e. R=Roughness, G=Height, B=AO) and why and how can I set it up so that it works with all of my existing textures as seamlessly as possible?
And then after that, you’ll start getting into the micro-detailed questions like: In the Vertex-Blending section of my material instance, how many parameters should I add so that the artist will feel like they have full control without it being too complicated to use?
The answers to most of these questions will almost always vary from project to project and will usually only come through stress-testing your materials. Try using them in different setups with different models, using different types of textures and you’ll quickly discover what works and what doesn’t.
Using Material Functions
I use them for almost everything. Material functions basically group bits of material functionality into a modular, drag and drop format that can be used inside of any material. They make iteration easier as you can reuse them anywhere, they help to keep your material graphs clean and tidy and they make bug-fixing your materials a snap (fix it once in the material function and it’s fixed in every material that uses the function).
In general, I’d try to generalise the naming of your function inputs as much as possible. Anybody should be able to look at the function, understand what it does and how to use it purely based off of their naming. Also keep in mind that purely based off of the values next to the Function Input name you can tell what type of input is needed for the Material function to work properly. V1= A Constant Vector Input (Single Number Value), V2= Constant2Vector (A colour with two values - good for UVs or coordinates), V3= Constant3Vector (A colour with three values - X,Y,Z coordinates, R,G,B colours), B = A static boolean value (i.e. true or false). There are many more, but these are the most commonly used.

Most of the time I try to keep most of the named parameters outside of the Material Function so that I can have uniquely named parameters for each material I use them in. This gives the Material Function flexibility and increases its ability for reuse because I’ll now have the option of renaming those parameters for each material that I put the function into.

Named Parameters outside of the Material Function
Tips on Learning about UE4 Material Creation
Head to either YouTube or the UE4 online documentation site. Sounds obvious but you can find tutorials for learning almost anything on YouTube as there are thousands of videos dedicated specifically to creating anything ranging from junior to advanced materials. Some of the most obscure things I’ve wanted to learn in the material editor were found there.
For details on the functionality of specific nodes, also YouTube but the UE4 online documentation site explains literally everything as well, giving almost too precise of an explanation sometimes (you can tell that it was mostly written by programmers). The answers to most technical questions can be found there too but if you’re really stumped, go onto the Unreal Engine 4 Developers Community on Facebook. The group there has saved me endless times, giving me answers to almost any technical bind I’ve found myself in.
Thoughts on Tech Art in an Environment Artist Portfolio
I think if the person obviously knows what they’re doing, it’s great. I’d definitely be more inclined to hire somebody that’s more technically savvy than somebody who isn’t. At the same time, it isn’t essential most of the time as most large studios will usually have an entire department set up specifically for Tech Art. That being said, at a smaller studio they’re usually a lot more loose when it comes to the responsibilities of each individual. At the end of the day, tailor your portfolio to the type of studio that you plan on applying at, doing research and figuring out exactly what those responsibilities will be on a day-to-day basis.
Outro
I hope this article gave some info on how to get into the thought process behind material creation. Because of the vast amount of learning materials out there (YouTube, etc) it’s easier than it’s ever been before to learn almost anything you could ever want to in Unreal 4. Thanks for reading!