Learning Houdini AS an Environment Artist
Mohamad Salame talks us through how he used Houdini to create Self Construct. He also explains how to use Houdini in terms of navigation, workflow, technical knowledge and much more!
Introduction
My name is Mohamad Salame, 23 years old from Lebanon. I’m currently in my 3rd and final year at Durham College Toronto Canada (2020). First, I went to do Architecture at “Ion Mincu University” Bucharest, Romania because I enjoy drawing. I had one elective class in my first year where we learned Autodesk Maya, that was enough for me to realize I could use it to make games. All I did was Maya at that point, eventually I dropped out! I kept learning and searching for a school for about a year. I couldn’t find any school curriculum that I liked so I did the smartest thing ever! I contacted my favorite 3D YouTuber Tiedie “Dylan Abernethy” and asked him what school does he go to and went there. We became Gym buddies and I learned a lot about 3D from him! It sounds like a fairy tale but I swear it’s true. I then picked up Houdini over the summer of 2019 and we’ve been together ever since, sorry Maya.
Art and Tech Breakdown
Composition
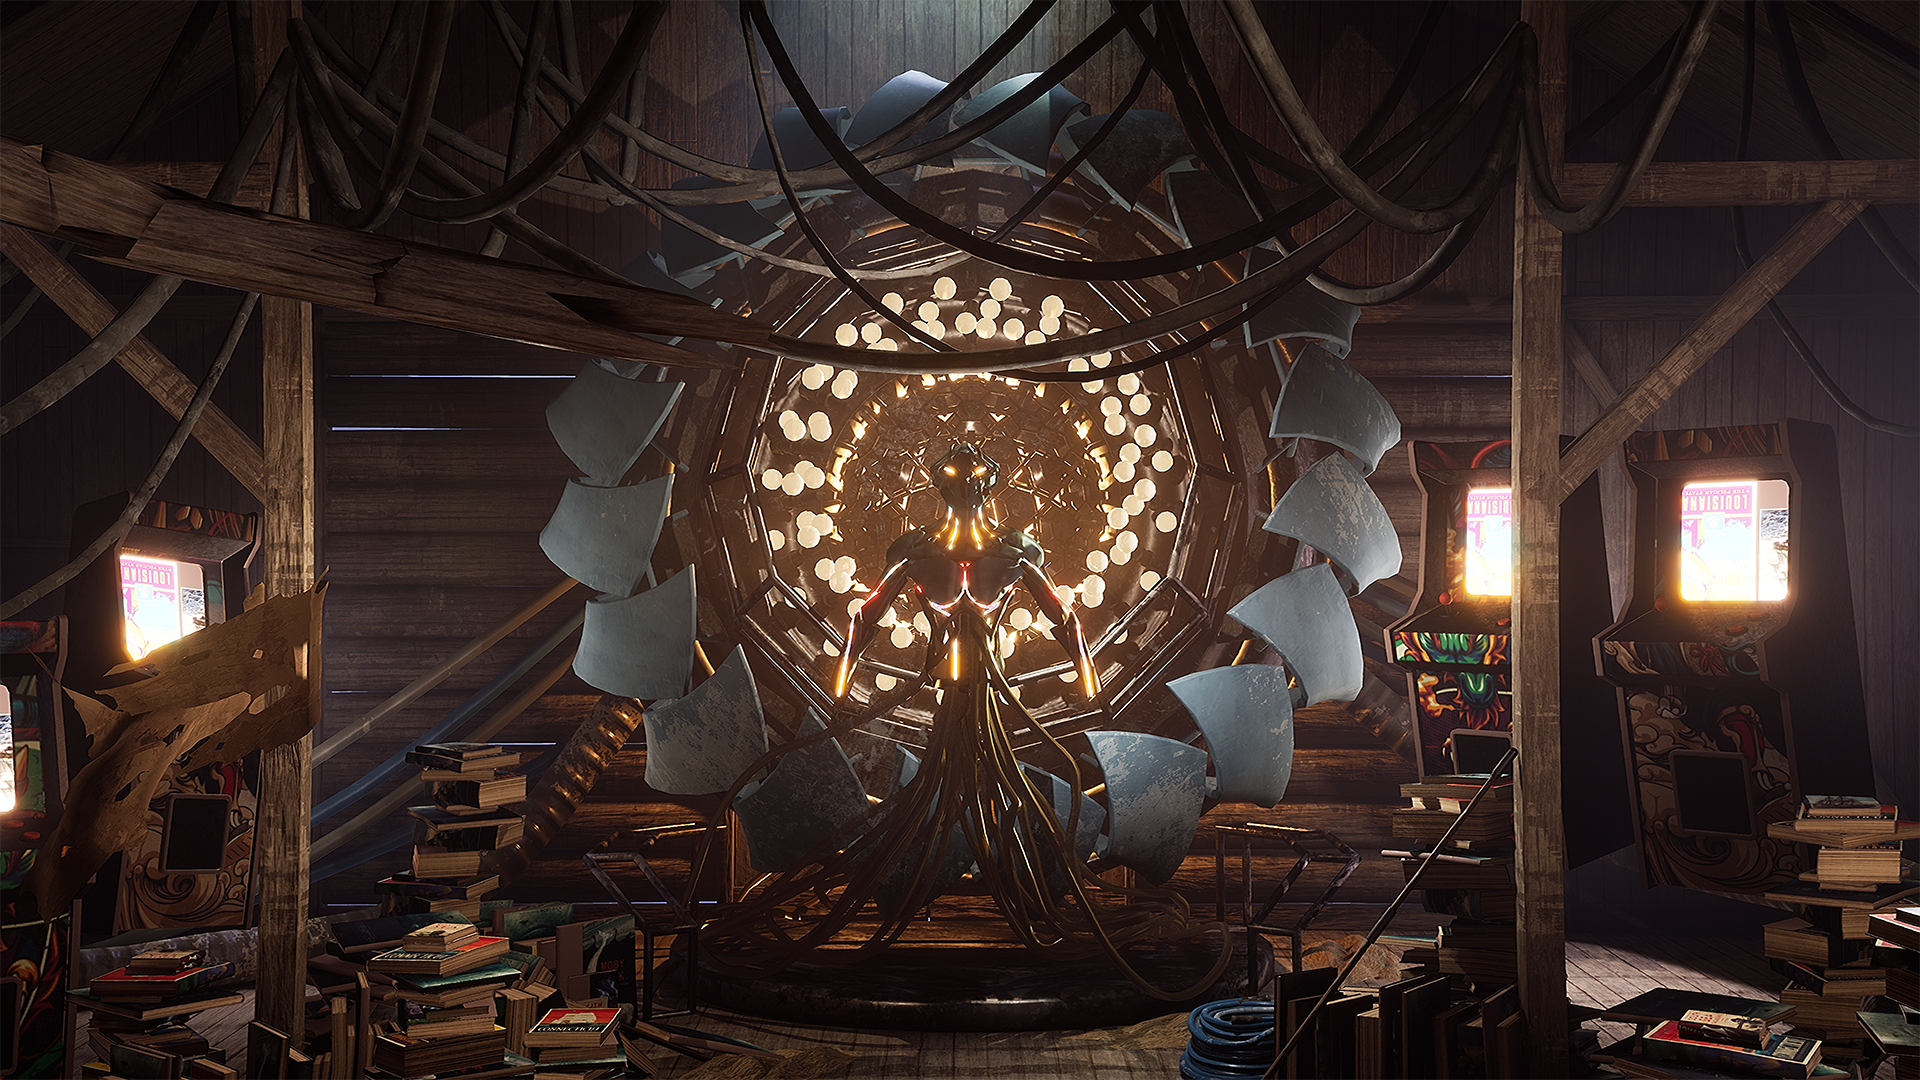
I used complementary colours with albedo and lighting to pull the focus into the centre and dialled up the volumetric height fog to achieve a “Stranger Things” kind of mood. In terms of tech, the scene runs at 110 fps with a Nvidia GTX 1080.
Modelling
Modelling all modular parts at once and stacking their UVs on an Atlas to optimise for real time. With linked parameters I can change the model and the UVs update automatically.
Atlased UV’s
Using those modules to layout a barn:
This can’t be used at runtime yet, it’s only for world building.
Creating The Books
Placing each book by hand would take forever but with this tool I can feed it bunch of books, it’ll measure them and stack them accordingly.
Texturing
I found this Substance Designer tutorial really useful in terms of optimisation! I used crop instead of Atlas maker though.
Trim Sheets
I compiled tileables and trims into an atlas to optimise for draw calls. Textures were made in Substance Designer.
Multiple UV Channels
Using multiple UVs per asset to layer grunges to break the tiling without having to use a ton of decals.
Animation
I used Soft VAT to translate the Dops/ Vellum/ Sops animations into engine.
Robot Animation
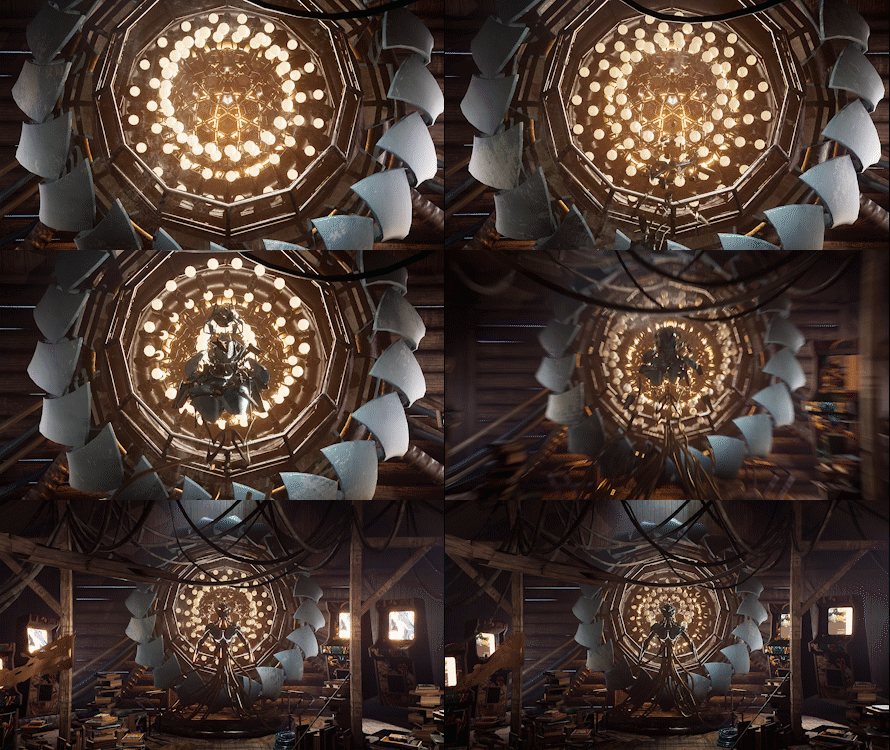
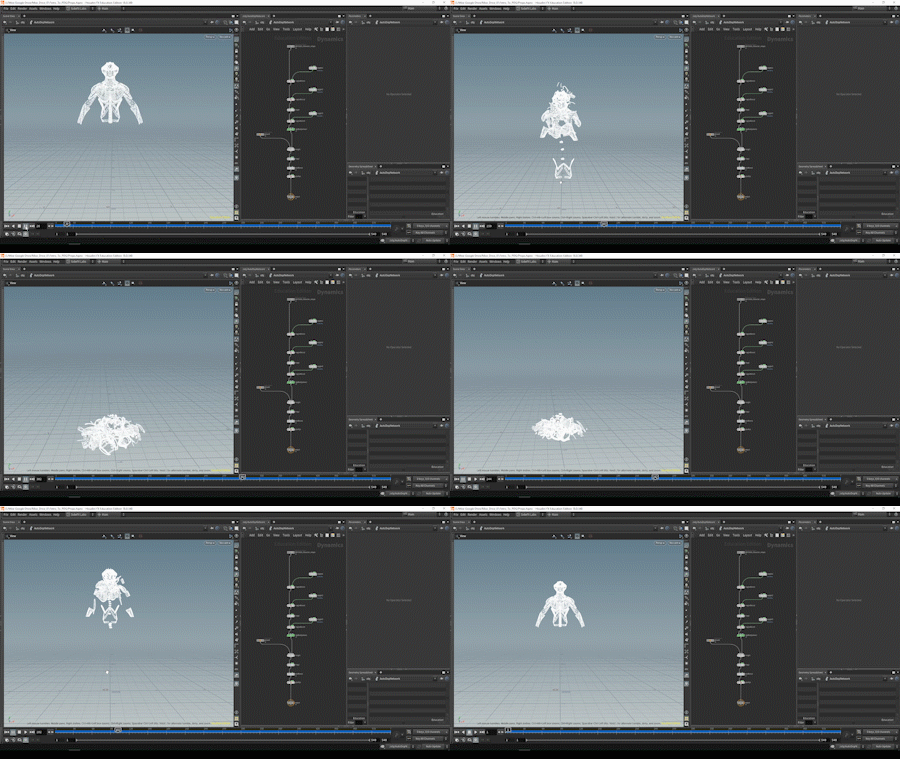
This is a falling simulation with Dops playing backwards brought into engine using Vertex Animation Textures. It uses “magnets” to break it apart or hold it in place and “drag” to slow down the fall.
How to Learn Houdini
Don’t you wanna learn some dark magic? I know you do! Well, if you’re a 3ds Max/ Blender/ Modo/ Cine4D user imagine an endless stack of modifiers (nodes) that you can connect in a tree like form as Substance Designer with for loops that wrap around some nodes to compute them multiple times with the ability to code your own nodes. Grasp that and the world is yours! Run free my child! If you’re a Maya user like I was, the closest thing I can compare it to is like parenting things together in the outliner or rigging environments instead of characters. Often people get turned off by the idea of proceduralism thinking it’s a bunch of random noise, but it can be as art directable as you want. Take substance designer for example, artists are doing crazy work with it these days!
Houdini in Substance Designer Terms
This is a comparison between Substance Designer and Houdini. With nodes you can change one thing up at the start and everything will change accordingly downstream.
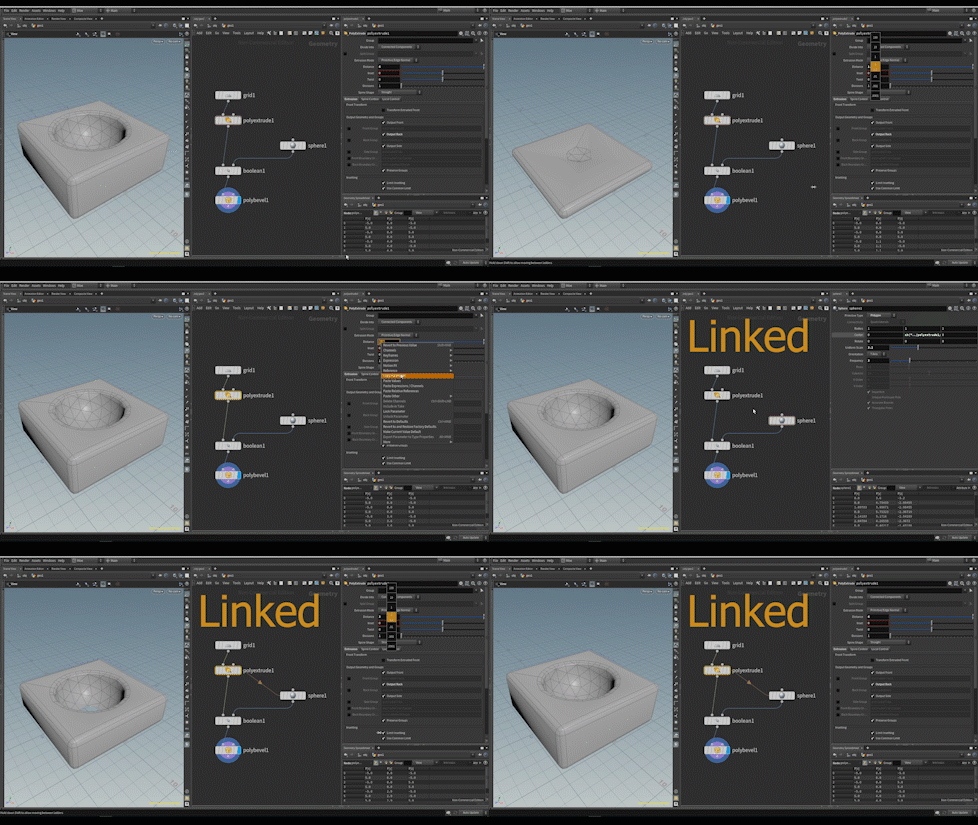
Switching the Order of Operations
The PolyBevel has a hard edge tolerance option, that’s why not all the edges were bevelled.
No need to Ctrl-Z or to save other copies of your model. It’s always there at all times. You could even branch out too to get different results from the same root.
Linking Parameters
By linking parameters, you can control bunch of changes with one slider. It’s like exposing parameters in Substance Designer. Link enough parameters and you can change your whole environment with one slider!
Subnets
This didn’t require any coding to make! It’s just a lot of the same stuff layered on top of each other. There are more sophisticated techniques that could be used to generate details such as Akira Saito’s work, but here I wanted something very specific. It didn’t make sense to make a whole system just for that, so I made a quick ZBrush sculpt and got it into Houdini for retopology.
How to Start Learning Houdini
I know you’re here for this one, so read carefully! They say Houdini has a really steep learning curve but they’re wrong! Houdini is a brick wall but if you keep smashing your head into that wall, eventually it’ll break.
First start by consuming lots of data until you catch a pattern. Watch tutorials, talks anything Houdini related.
Mess around with Sops “Surface Operators”, try to understand what the nodes do and put down notes next to each setup explaining what you’re doing.
Learn about attributes and let the spreadsheet guide you.
After 2 to 3 months in you should start learning Vex to unlock Houdini’s full potential! (Cgwiki joy of vex)
Pick a relatively small scene and try to finish it. You learn more while trying to achieve something than learning for the sake of learning.
Quick Overview
This part might look gibberish now, but you can always come back to it later once you get more into Houdini.
Here Entagma covers the basis of Contexts
There’re quite a few contexts as you can see, but let’s just focus on OBJ where inside you can find Sops which we’ve been working with earlier. Next up hotkeys! If you want to see your family, use shortcuts! The UK fell 100 years behind for not using Leibniz notations. It might seem insignificant at the moment, but every second counts and they add up! If you navigate faster, you can learn faster! I changed the layout to fit my needs in the next image.
Navigation
Parameters: You can hit middle mouse and scroll over values for better accuracy, link parameters and write expressions. Geometry Spreadsheet: You can see the attributes of the geometry in there. I’ll go more in depth later. Scene View: press 1, 2, 3, 4, 5 to switch between 3d/ Ortho/ UVs. “W” for wireframe, “Shift W” for wireframe on shaded. Network View: Select a node and hit “R” to view it, “E” for template, “W” for selectable template and “Q” to bypass. If you play league of legends, your hands are in the right spot! Here’s a video by Fianna Wong that goes over the hotkeys.
Now let’s talk about Attributes. Geometry makes up surfaces and surfaces have attributes. We can think of attributes as the description of our geometry. Just like you’re beautiful and awesome, point 0 has a specific position/colour/number/normal…
Geometry and Attributes
You might be wondering where are the edges? Who needs edges?! We can refer to them as the connection between two points, “p0-1” is the edge between 0 and 1.
For the next step, let’s use some Vops and Vex on Sops:
Vops and Vex
Method 1: Transform which is the regular node you would find to move, rotate or scale geometry.
Method 2: Vops are “Vector Operators” which look like Unreal Blueprints. It’s code compiled into boxes “functions” ready for you to use.
Method 3: Vex!! Which is Houdini’s coding language that scares off artists, but you could see how powerful it can be. I did the same operation with a single short line of code. You could even write it like this @P *= 2; if you’re really lazy like me.
Spreadsheet
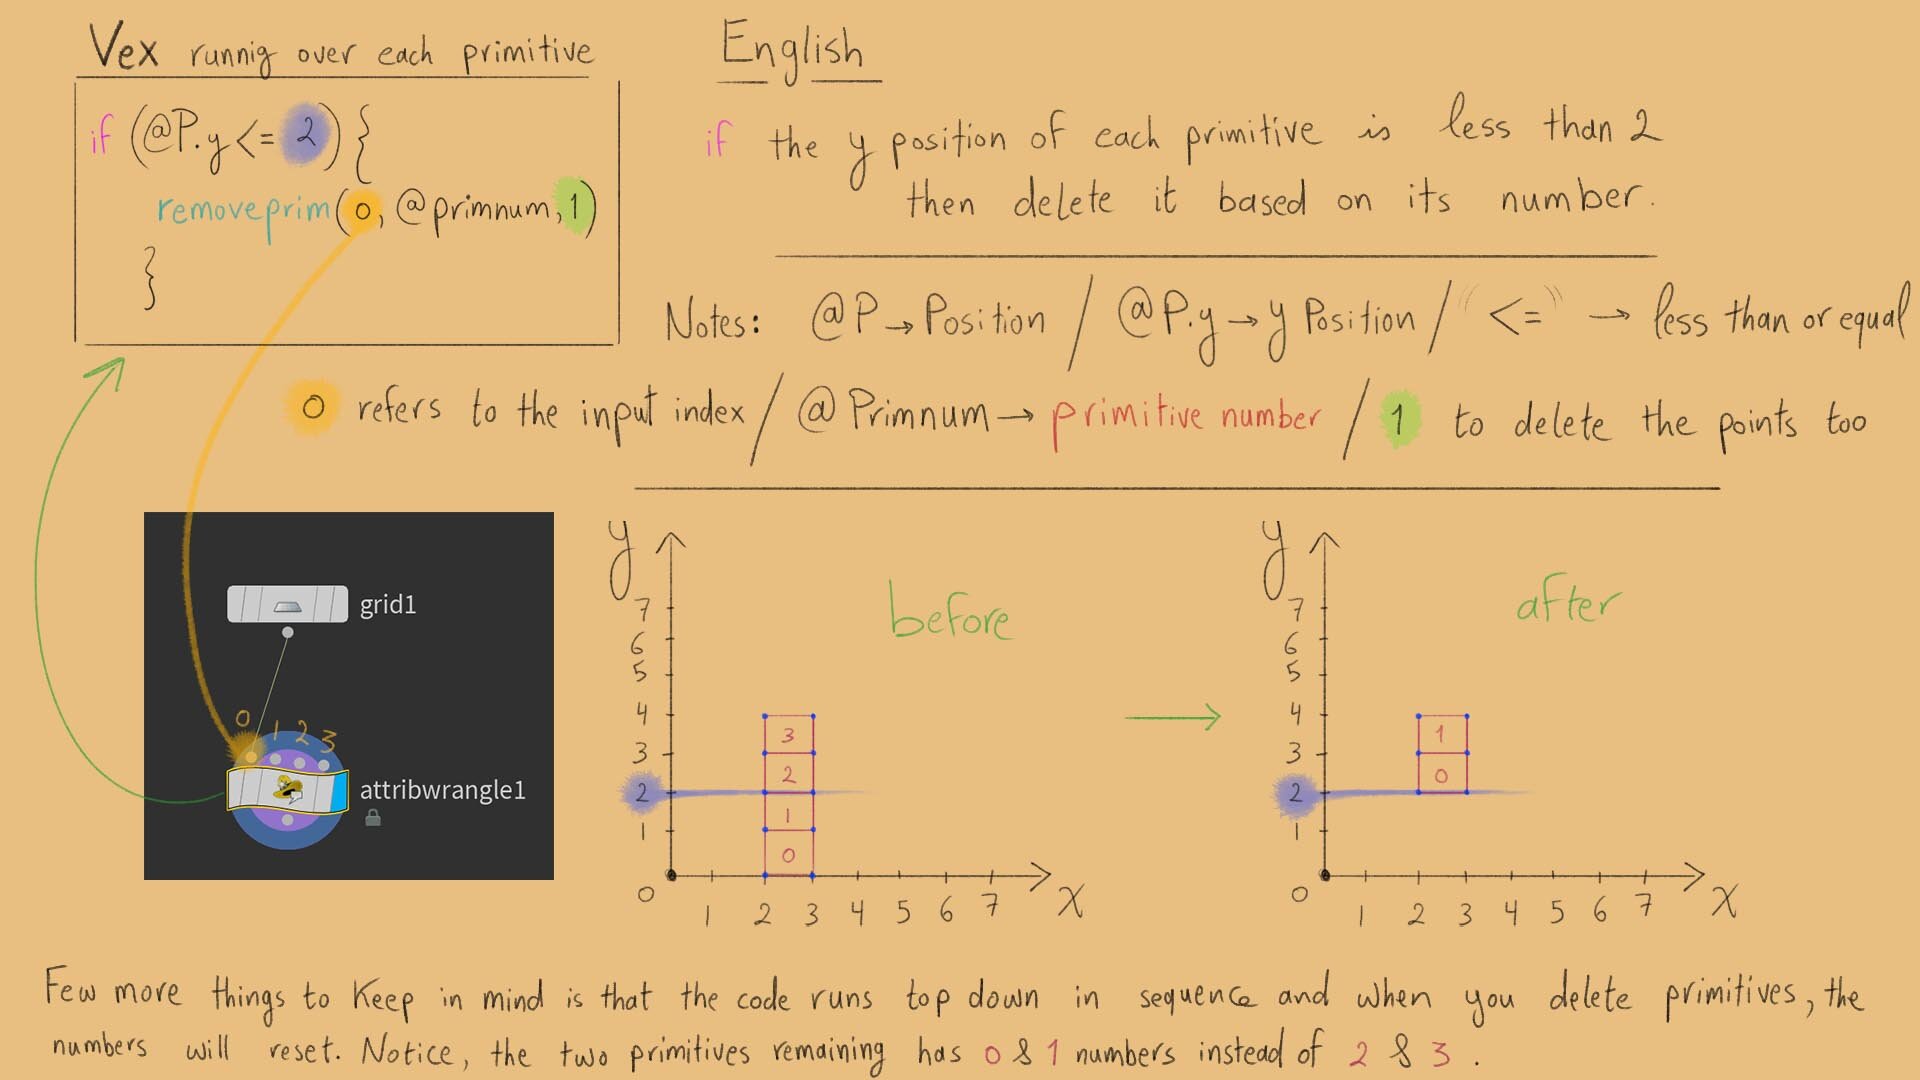
This is another scaling example on simpler geometry to visualise what’s happening with the Position Attribute for each point in the Geometry Spreadsheet. Diving more into Vex using an if Statement:
I would be impressed if you were able to keep up this far. Let’s look at a practical application…
This combines everything we’ve learnt so far with one extra thing on top that is For Each loop:
Vex
How Did I Learn Houdini?
For starters here is a really great beginner into tutorial. My learning was mostly influenced by the people in the big islands and I learned some more general useful bits from the ones in the smaller islands. Your path might be totally different from mine but I do recommend you check out the highlighted names. Keep in mind, I’m a bit biased here.
Houdini Road Map
I had 3 years of modelling/ texturing experience with a bit of procedural knowledge from substance designer. Getting into Houdini was easier than getting into designer because I’ve already learned to think procedurally. The transition was as simple as learning new terms for the same techniques I previously used. The biggest hurdle was the coding part because I’ve never done that! It took 20 days of “Cgwiki joy of vex” until I was up and running! I also recommend watching this video by Peter Claes.
Inspiration
I look up to the amazing work people are making! I’m gullible enough to think I could do it too, so I keep going! The more I learn the more I realise how much I still need to learn! This is an endless cycle, isn’t it?
Feedback
I mostly seek feedback from private Discords and online communities (Think Procedural Discord). Other times from teachers, classmates and family members.
Additional Advice
One does not simply learn Houdini, it has to become a habit
Organise your graphs! Use notes, frames, colour coding
Learn to love being a beginner and look for what scares you to find the next step. I was afraid of ZBrush once!
You don’t have to learn the whole software to use it! Just learn what you need so you can make what you want!
Reshape yourself to ride the current that’ll take you where you want
Future Plans
I want to learn more about the techy side to automate things that make things that move things, curl back and loop onto itself, let it run, sit there, click that button, have my drink and do my evil laugh!
Outro
I’ll keep learning and share whatever cool things I stumble upon! Hopefully you’ll find them useful, learn from them and teach others! Creating a beautiful cycle of learning! I just need a friend who can speak Houdini.
If you have any questions you can contact me on my Artstation and here you can find my Self Construct Procedural Environment for free on Gumroad.

